Design, Iteration, & DFAM in CATIA
The bookshelf brackets I've been working on ended up with a serviceable result (middle pair in yellow). It felt, however, more engineered than designed. For a piece of furniture that would be all over my house, it didn't feel exactly how I wanted it to. The design was more suitable for the workshop than the living room. I wanted this to be a BOOKSHELF bracket, not just a SHELF bracket.
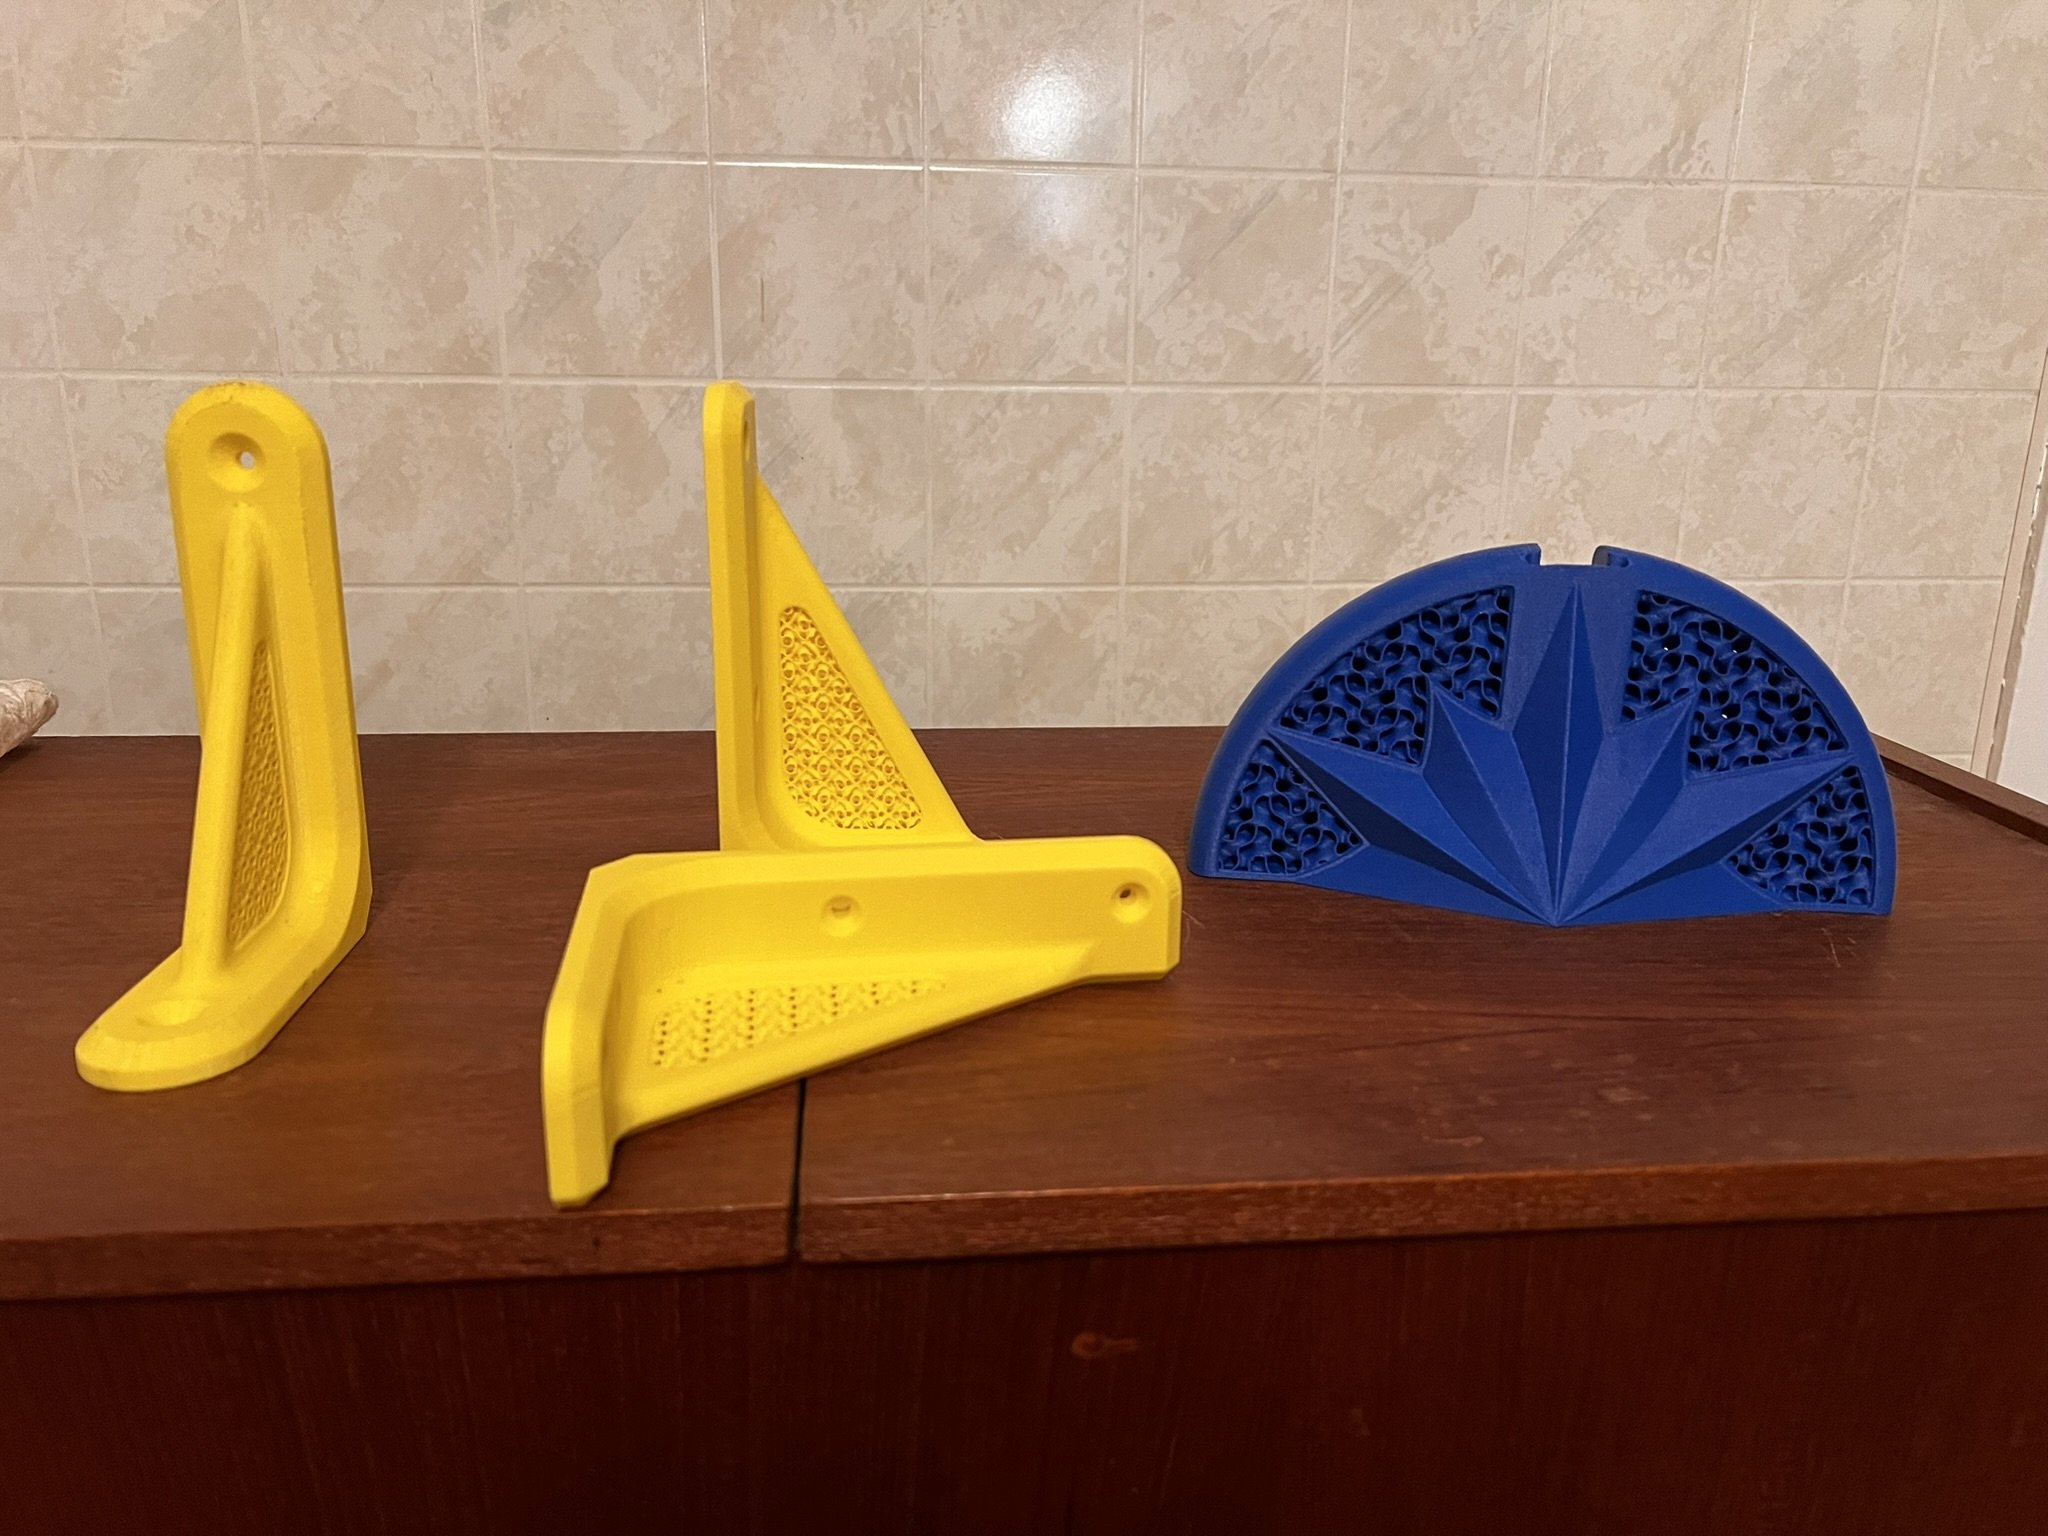
The design space of all 3 of the bracket examples you see above was the same. I had a material and technology I wanted to use (ABS-GF, FFF 3D Printing). When I design a piece, I want it to be a display piece for the manufacturing technology if at all possible.
This is not always easy, though. CNC machines and 3D printers can often feel like "anything machines"; paring down that design space to find something aesthetically pleasing can leave you with choice paralysis.
For machining, I have found a good starting heuristic: How do I make the fit and finish feel satisfactory in the hand? Surface finish dramatically impacts aesthetics, so finding the correct tools and feeds and speeds are critical. Since multiple setups for a simple bracket like this out of a billet would be challenging, does that leave room to fabricate a single part out of smaller pieces? Using steel for a main body with brass accents and generous chamfers are slam dunks for elevating a simple piece.
3D printing, however, especially #FFF 3D printing, generally relies on the design more than the actual manufacturing parameters to make something nice. The geometric limitations are well known (e.g. teardrop holes or hexes instead of circular holes). But beyond the limitations, how do I make something that could only be done with additive, display an understanding of the technology, and use it to my advantage?
I felt like I was onto something with the window in the bracket stiffener. The end user could see the infill pattern within the part through that window. Infill is used in a 3D print where negative space would be, so let's use that infill negative space between the design elements and add some functionality!

The first shelf bracket iteration
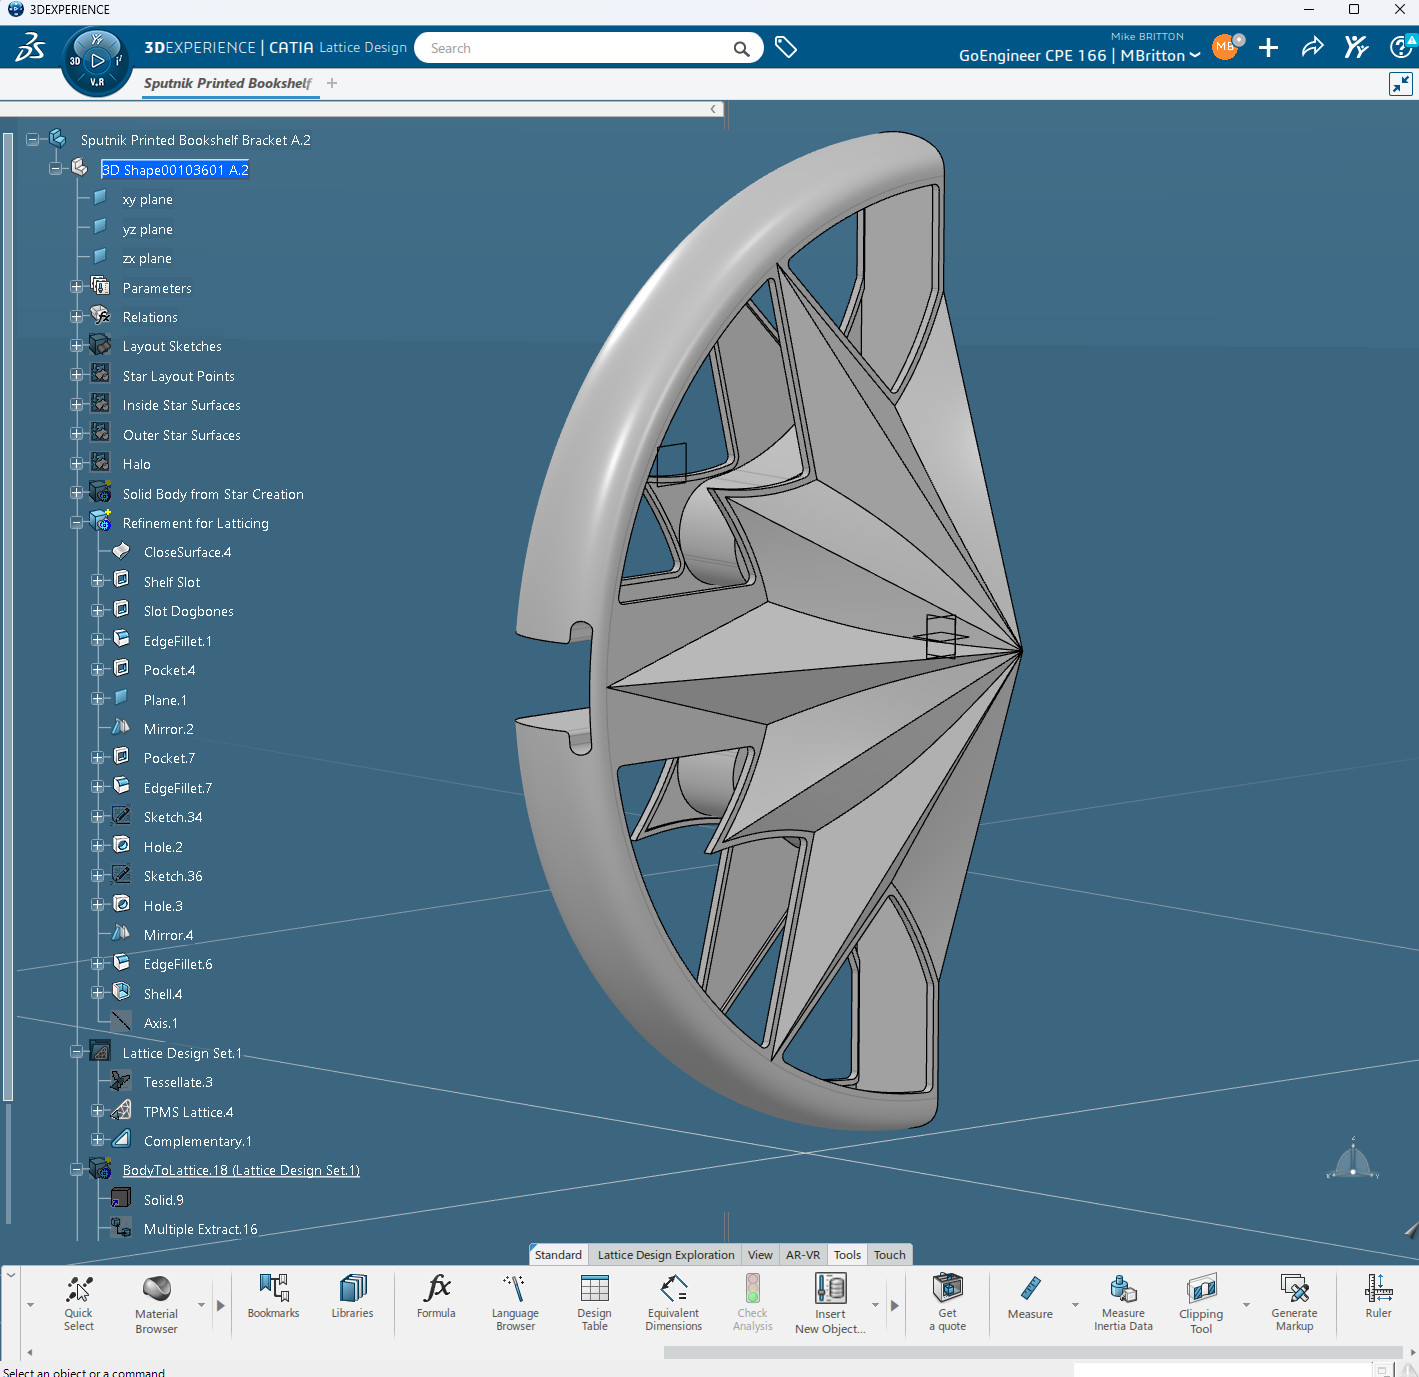
I wanted something that would rise above the shelf level and help support my books while holding the shelf against the wall. A big semicircle for the overall profile would be eye catching and support the books held within the shelf.
We have a mid-century modern aesthetic for a lot of the house, and because the material I'm using comes in bright primary colors, I wanted the finished piece to stand out. A star for the space-race aesthetic seemed like an obvious choice, and YOWZA! That was an exciting process to learn the hard way in CATIA coming from other modelers.
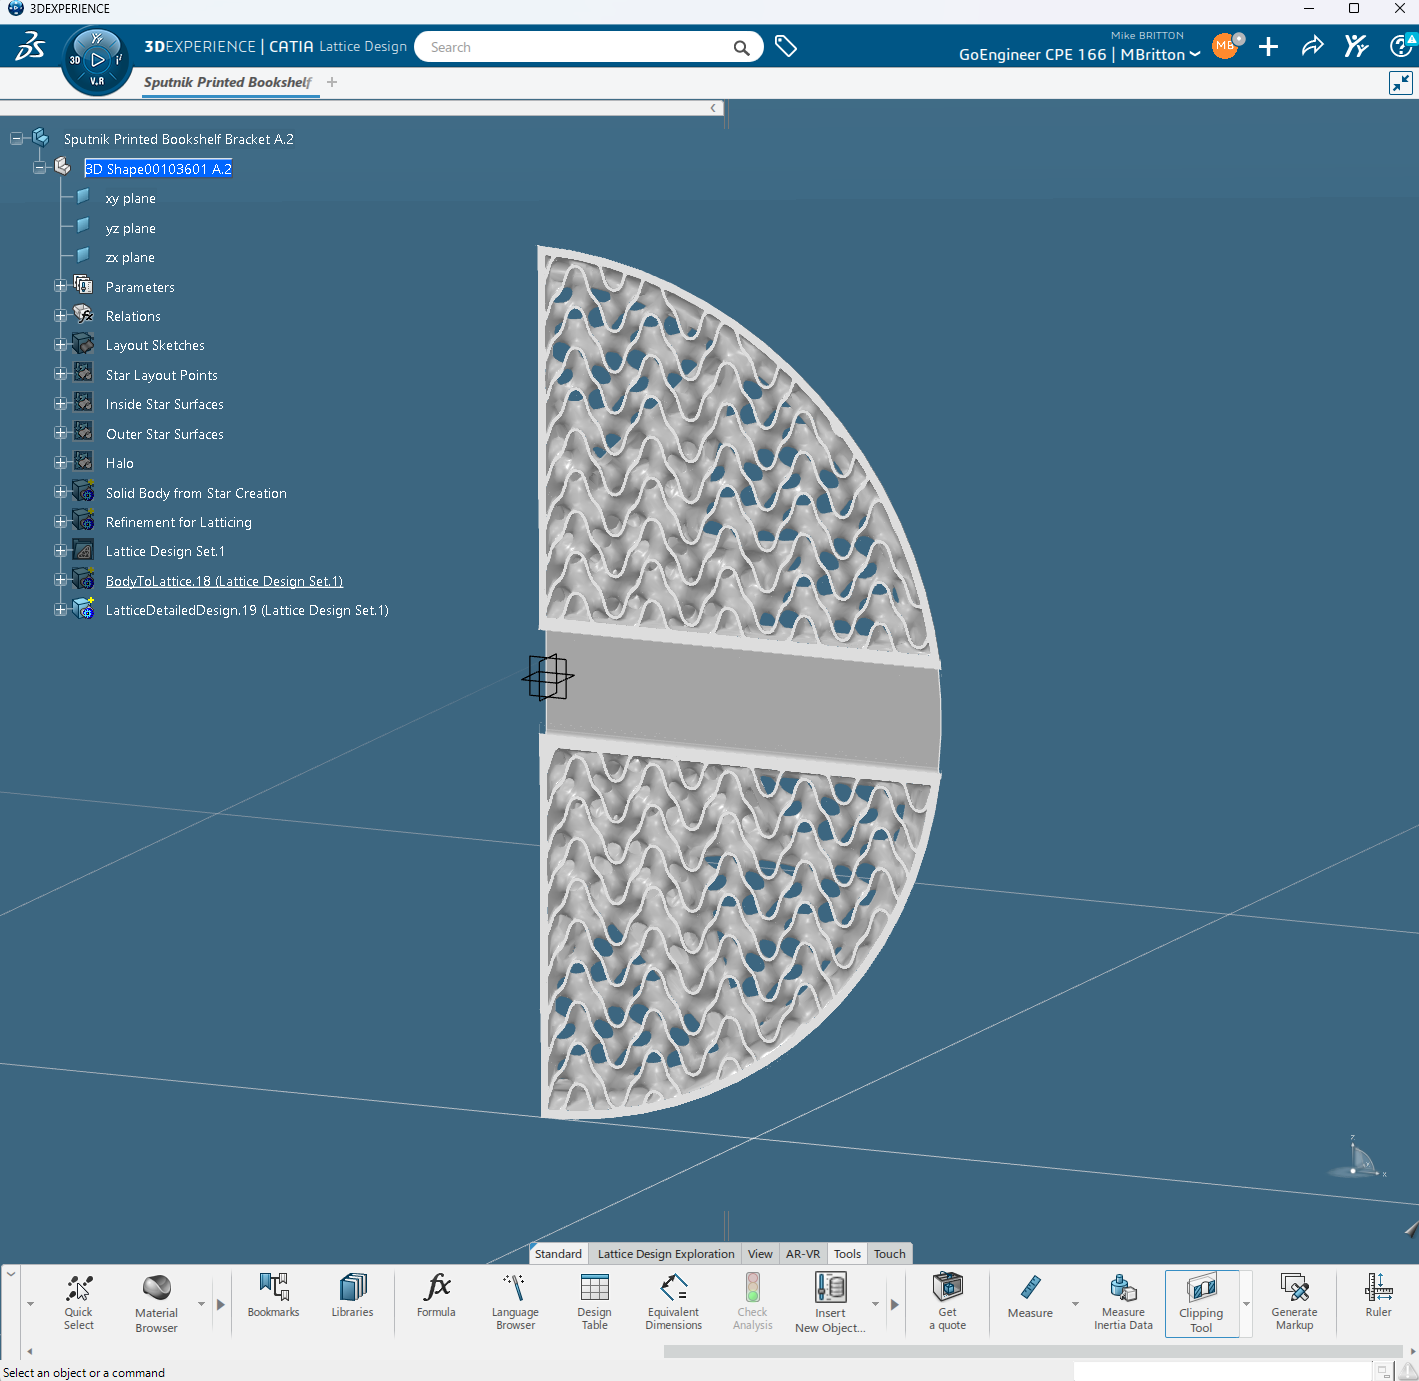
The real difficulty would come with getting this into the lattice design tool. I had a slot for the shelf with some clearance for metal edge banding, my star, and the rim, but I needed to remove all the material that would become infill as well as the skin between those designed parts. I would then take all those internal surfaces and cap them off on the outside so I had single volume represent my entire infill with the TPMS lattice exposed to the outside. Making that single contiguous volume was important not just for manufacturability, but also making the software behave and not take a full afternoon to update. But most of all, using the empty space in my manufacturing process was a natural way to transform the visual empty space in my part. I wish shell operations had been sufficient, but it took quite a lot more surface modeling than that.


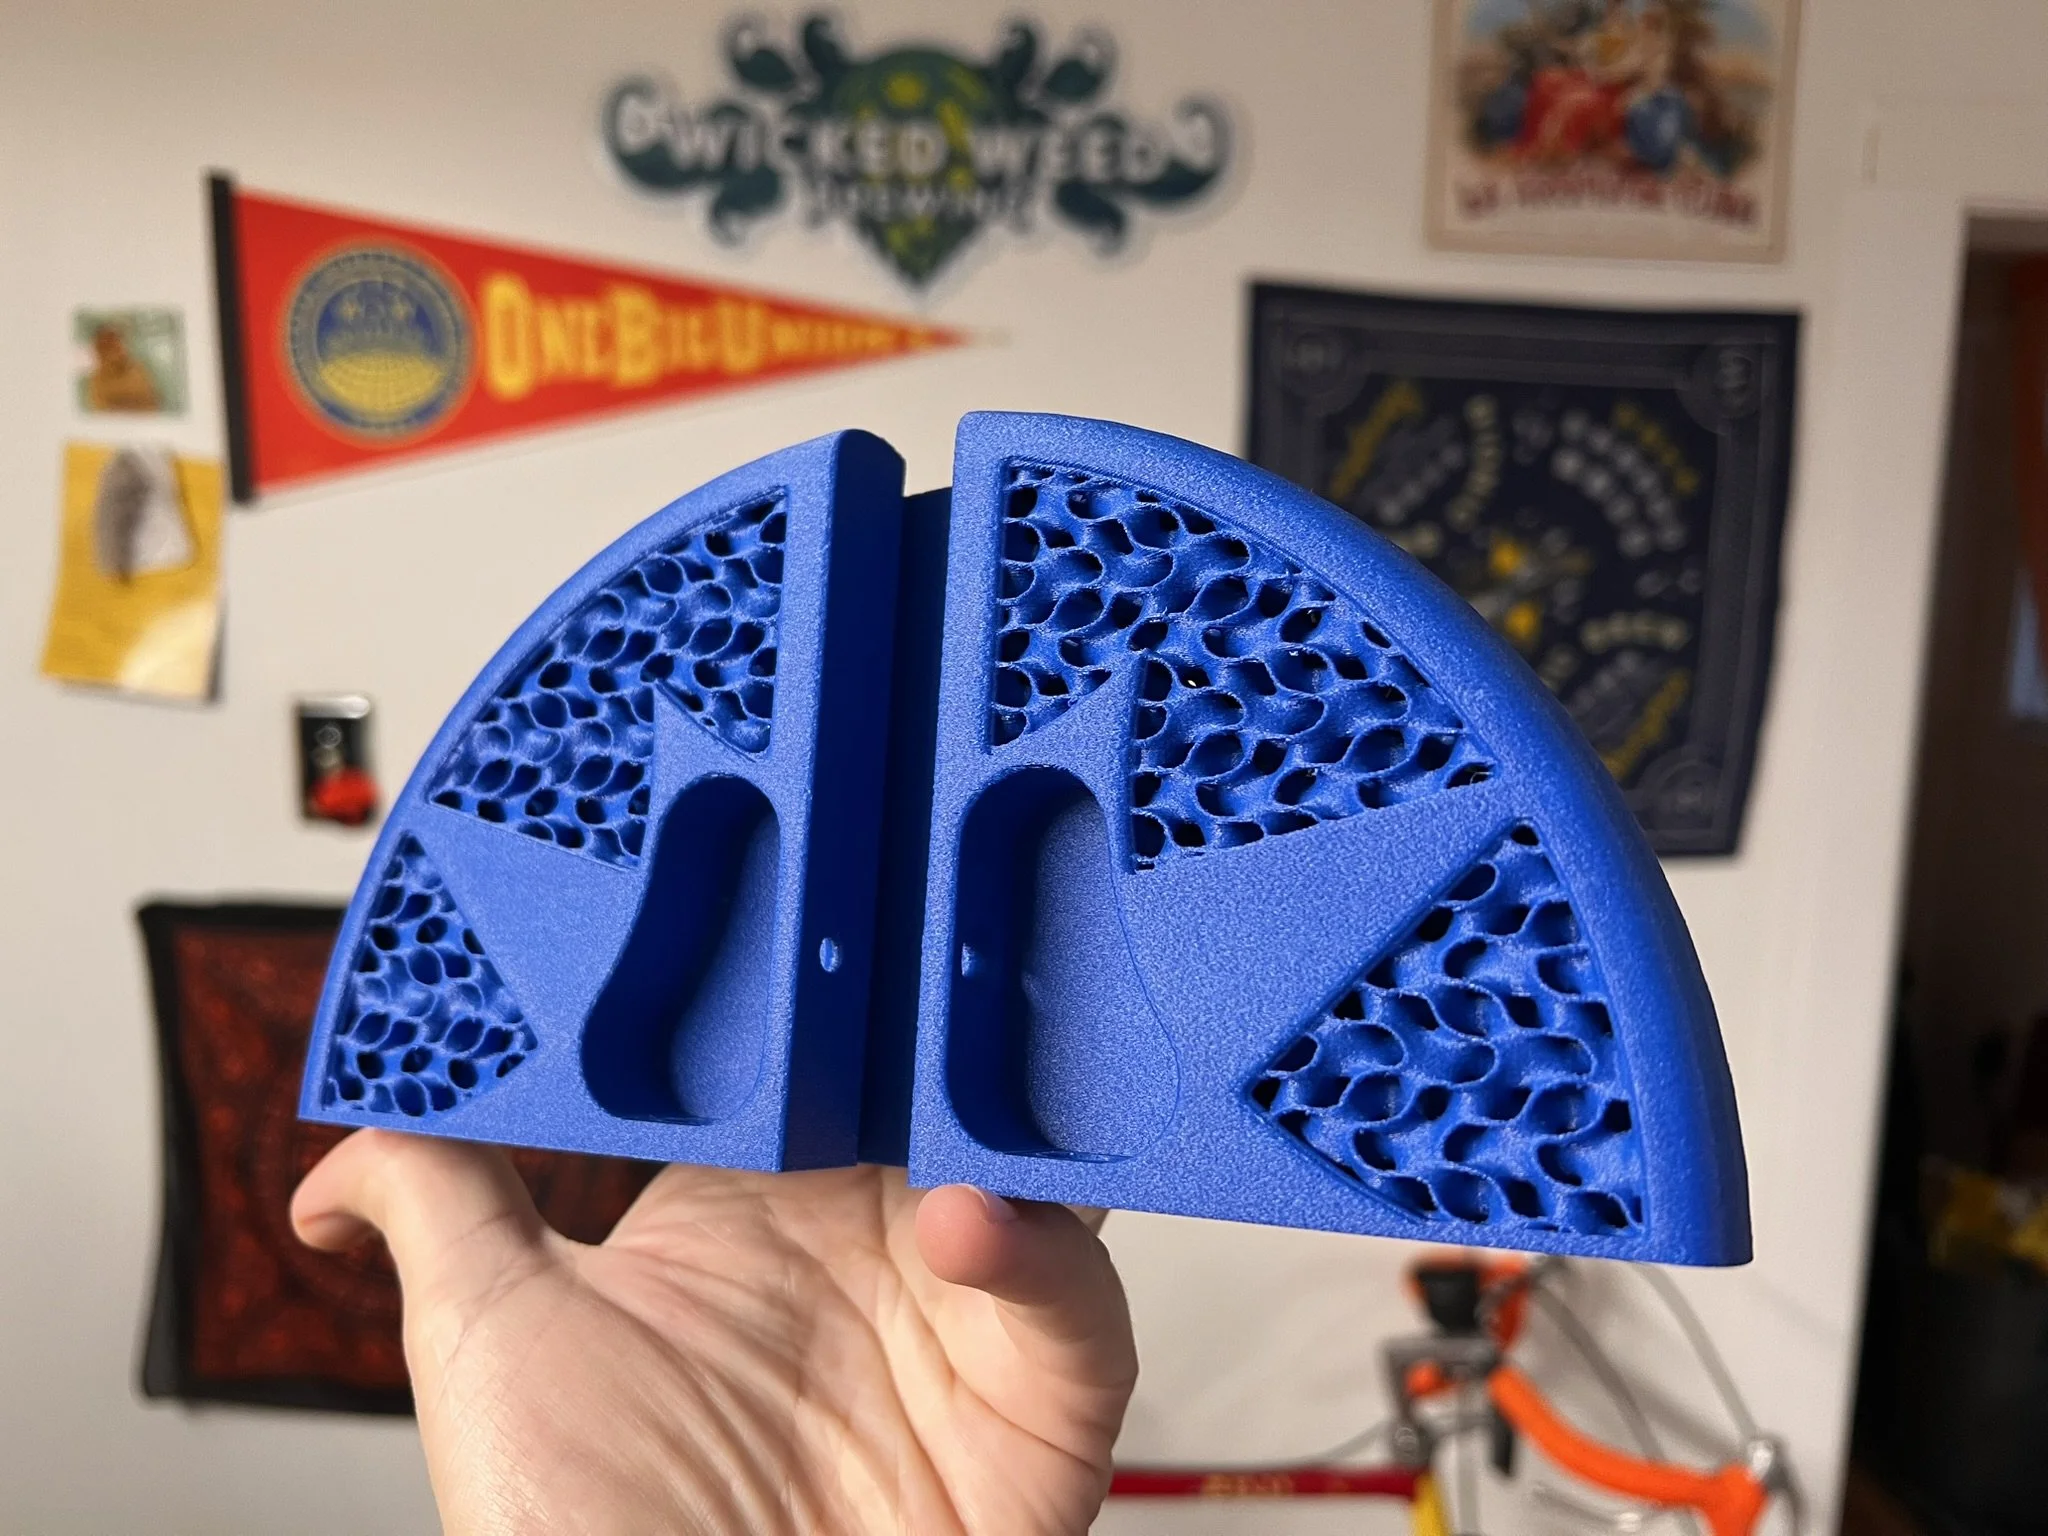

There are so many great reasons to use additive manufacturing. Purely for manufacturing properties, I was able to create a part which would have required 4 setups. The 3DEXPERIENCE CATIA Lattice Design role has incredible capabilities for engineering: you can have a 1:1 part of your design in your digital assemblies for simulation; you can create whole new categories of parts that would otherwise need to be fabricated or assembled; you can create incredibly compact heat exchangers and osseointegrated structures. And also, just like with handmade or individually machined objects, you can create something that evokes emotion.